Kakobuy Keyboard QC Photos: Details and Google Sheets
Kakobuy Keyboard QC Photos: Details and Google Sheets
After a mechanical keyboard arrives at the warehouse, QC photos aren't a substitute for functional testing. Instead, they help buyers verify appearance, quantity, model clues, and included accessories before shipping. This article focuses on a specific task: reviewing the full set of QC photos provided on the Kakobuy website and organizing the visible results into Google Sheets, so you can decide whether to request extra photos, consult customer service, or proceed with shipping.
This guide is for users who already have an order, warehouse images, or QC records and need to do a visual check before shipping. It's not for judging switch feel, Bluetooth stability, LED lifespan, internal solder quality, or product authenticity based solely on photos.
By the end, you should be able to do three things:
- Review mechanical keyboard QC photos in a consistent order.
- Record layout, switch labels, accessories, and anomalies in a spreadsheet.
- Write clear requests for additional photos based on missing angles and evidence strength.

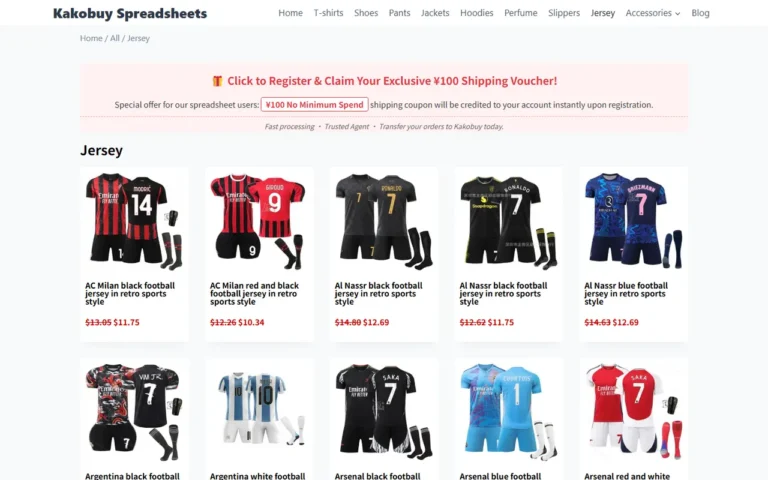
Image: Screenshot used to illustrate the product catalog and photo verification scenario. This image does not represent the complete official QC interface and cannot independently prove product condition.
What Specific Problems Does Mechanical Keyboard QC Review Solve?
Before reviewing, limit the question to "Is the visible information before shipping consistent with the order record?" For mechanical keyboards, focus on the following:
- Does the appearance color and overall shape match the order notes?
- Is the keyboard layout consistent with the ordered model, such as different sizes, layouts, or orientation versions?
- Are visible accessories like keycaps, cables, receivers, storage accessories, and documentation present?
- Are there obvious abnormalities in port locations, knobs, indicator lights, kickstands, or case edges?
- Do the photos cover enough angles? Are there any areas that cannot be judged?
Kakobuy's inspection rules mainly check external information such as style, quantity, color, size, and model. For mechanical keyboards, this means photo verification supports comparison of appearance and visible accessories, but it cannot be expanded into a complete electronic performance test report. 🔎
How Do Product Page Specs, Order Notes, and QC Photos Divide Responsibilities?
These three types of information have different roles and should not be mixed into a single conclusion.
Product page specs establish expectations, such as size, layout, connection method, switch options, and package contents. Order notes record the version you actually selected and any items you specifically asked to check when ordering. QC photos show the visible condition that the warehouse can currently capture.
Follow this order for review:
- First, read the product page and order notes, and circle the fields that must be verified.
- Then view the QC photos and confirm what is actually visible in them.
- Separate records into "Confirmed," "Not shown," and "Needs additional photos."
- Do not assume that because the product page lists a certain configuration, the warehouse photos have already proven that configuration exists.
In particular, note that the option names on the product page may be short, and the markings in the photos may be unclear. In such cases, keep the original text and mark the judgment as "To be confirmed." Do not fill in model or switch names on your own.
First Check Keycaps, Case, and Port Locations in Website Photos
To avoid repeated viewing or missing anything, set a fixed photo order.
First, look at overall photos. Confirm that the keyboard size, layout outline, color combination, and case shape match the order record. Overall photos only help judge the general appearance and cannot prove internal structure or that every key works.
Second, look at the front and keycap area. Check for obvious missing keys, misalignment, damage, severe scratches, or color differences. If the image resolution is insufficient, record "Cannot confirm" rather than writing "No problem."
Third, look at the back and sides. Focus on the kickstands, bottom case edges, label area, screw positions, and obvious dents. Side angles help detect case deformation or edge damage, but still cannot prove that internal clips are intact.
Fourth, look at ports and cables. Record port location, port appearance, whether cables appear in the frame, and whether the connection area is clearly visible. If cables are not in the photo, that does not necessarily mean they are missing—record as "Not seen in current photos."
Fifth, look at accessories and packaging. If accessories are laid out together, record them by count and category. If accessories are still in sealed packaging, the photo may only prove the packaging's appearance, not its contents.
How to Record Layout, Switches, Accessories, and Anomalies in Google Sheets
The goal of the spreadsheet is to have one row per order or item, not to dump all observations into a notes field. Recommended fields:
| Field | Recording method |
|---|---|
| Order identifier | Use the platform-provided order or warehouse identification; do not expose complete sensitive information |
| Product page specs | Record size, layout, connection method, and option text as-is |
| QC photo set | Record the number of visible photos or the range of photo numbers |
| Layout check | Matched, Not matched, Cannot determine |
| Switch info | Record text explicitly shown in photos or order; if no evidence, mark as "To be confirmed" |
| Visible accessories | List items seen by category |
| Appearance anomalies | Describe location, type, and photo number |
| Missing angles | Record specific directions needing additional photos |
| Processing status | To review, Needs extra photos, Needs consultation, Ready for next step |
Don't use "Looks fine" or "Should be okay" as the main conclusion. More useful wording: "No obvious missing keys in the front photo; the right side port area lacks a close-up photo, so port appearance cannot be confirmed." This keeps the evidence scope clear and facilitates later communication.
Switches are easily misjudged. If the order option or photo label clearly shows the switch name, copy it as-is; if only keycap appearance or overall photos are available, do not infer the switch model from color, imagined sound, or common pairings. 📝
How to Link Photo Numbers, Product Links, and Spreadsheet Rows
This task does not require manually adding product links in the article. When organizing, use your existing order records, warehouse identification, or platform-internal visible numbers to create a one-to-one correspondence.
Use a simple numbering system:
- Create one main row per order.
- Use the same order identifier plus sequential numbers for each QC photo set.
- Record anomalies with the corresponding photo number, not just "the nth photo."
- If one photo supports multiple judgments, you can reference the number multiple times in notes, but do not copy the entire description.
For example, mark a photo set as "Order record A, photos 01–08," then write in the anomaly column: "Photo 04: possible scuff on left case edge, need close-up." This allows later viewers to quickly return to the evidence.
If the same order contains multiple items, split each item into its own row and add an item number after the order identifier. Do not combine multiple keyboards' layouts, accessories, and anomalies in one row, as that easily leads to mix-ups. ✅
Which Phenomena Are Only Visual Clues and Cannot Directly Infer Function or Authenticity
QC photos have a limited scope. The following conclusions cannot be directly confirmed from static photos alone:
- Whether all keys actuate.
- Actual switch feel, sound, and consistency.
- Whether wired, wireless, or Bluetooth connections are stable.
- Battery capacity, charging status, and battery life.
- Whether lights, screens, knobs, or macro functions work.
- Whether there are internal solder issues, liquid damage, or hidden defects.
- Whether the brand, collaboration, or special version is authentic.
- Whether the product is definitely new or never used.
You can add these items to a "Cannot be confirmed from photos" list and ask the platform if additional inspection services are available. Do not write "Functions normally" based on a clear appearance photo, and do not equate packaging, labels, or similar appearance with "Authenticity guaranteed."
Also, reflections, shadows, compression, and shooting angles in photos can cause misjudgments. For suspected scratches, bends, color differences, or missing parts, request closer, more frontal additional photos, and if necessary, ask to have the relevant parts placed separately and photographed.
How to Write Additional Photo Requests When Key Angles Are Missing
Additional photo requests should be specific to the object, angle, and purpose of judgment, avoiding vague wording like "Please take more photos." Structure them as follows:
- Item identification: State the item number in the order or warehouse record.
- Target area: Specify whether to photograph the front, back, side, port, or accessories.
- Photography requirements: State whether close-up, frontal, unobstructed, or accessories placed separately are needed.
- Verification purpose: Explain whether it's to confirm layout, port, case edge, accessory count, or anomaly location.
- Result update: After additional photos, fill the new photo numbers back into Google Sheets.
Example wording:
"Please take a close-up photo of the port for this item, and also photograph both ends of the cable. Current photos cannot confirm port appearance or whether the cable is included. Please add the photo numbers to the order record."
If you suspect appearance damage, write:
"Please take a close-up frontal photo of the right case edge, and provide a reference photo showing the full unit position. In current photos, that area is affected by angle and reflection, so it cannot be determined if it is a scuff."
This wording does not accuse the warehouse or seller in advance, nor does it turn unverified suspicions into definite defects. 📷
Final Action: Complete the Pre-Shipment Evidence Sheet for Mechanical Keyboards
After review, check whether the spreadsheet covers the following:
- Product page specs and order notes are recorded separately.
- Layout, color, and visible appearance have been checked item by item.
- Switches are recorded only with explicit evidence, not guessed from appearance.
- Accessories are recorded by category; items not seen are not written as missing.
- Each anomaly has a corresponding photo number and location description.
- Missing angles have been converted into specific additional photo requests.
- What photos can prove and what functions they cannot prove are separated.
- The spreadsheet does not contain full order numbers, payment information, addresses, or other unnecessary personal data.
Final actions can be divided into three categories:
- Proceed: Key appearance and visible accessories match records, and no items need further confirmation.
- Need extra photos: There are clear viewing gaps, but not enough evidence to judge anomalies.
- Need consultation: Found inconsistencies with order records, suspected missing items, or obvious appearance issues; ask the platform about next options.
Before consolidation or shipping, keep the original photos and spreadsheet versions, and note the date, modifier, and reason for changes in the change log. This does not increase product value or replace the platform's after-sales judgment, but it reduces communication costs caused by mixed-up photo numbers, memory lapses, or evidence gaps.
The main savings from this article come from reducing repeated viewing, avoiding wrong shipments, and lowering ineffective communication; the added risk is that static photos cannot verify electronic functions, hidden damage, or authenticity. It is suitable for buyers who want to systematically organize visual evidence before shipping; it is not suitable for users who treat QC photos as complete performance tests, quality certifications, or authenticity guarantees.